
How To Create Campaigns
What is a Coinvise Campaign?
A Coinvise campaign is your toolkit for building and rewarding an engaged Web3 community. It's a way to incentivise specific actions, whether on-chain or off-chain, by offering tokens or NFTs as rewards. Think of it as a bridge between your community's actions and their rewards, all managed through the Coinvise platform.
Why Do You Need Campaigns?
In the hectic world of Web3, attention is currency. Campaigns help you:
- Drive engagement by rewarding active participation
- Grow your community organically
- Distribute tokens or NFTs in a structured, purposeful way
- Align community actions with your project's goals
How Do Campaigns Work?
Coinvise campaigns work on a simple principle - complete an action, earn a reward. Here's the breakdown:
- You set the rules: Define what actions participants need to complete.
- Participants engage: Community members complete the required actions.
- Rewards are distributed: Tokens or NFTs are sent to qualifying participants.
Now, let's walk through creating your first campaign.
Step 1: Access and Initiate
Head to the Coinvise Feed page. Make sure your wallet is connected – your campaign will go live on your current network.
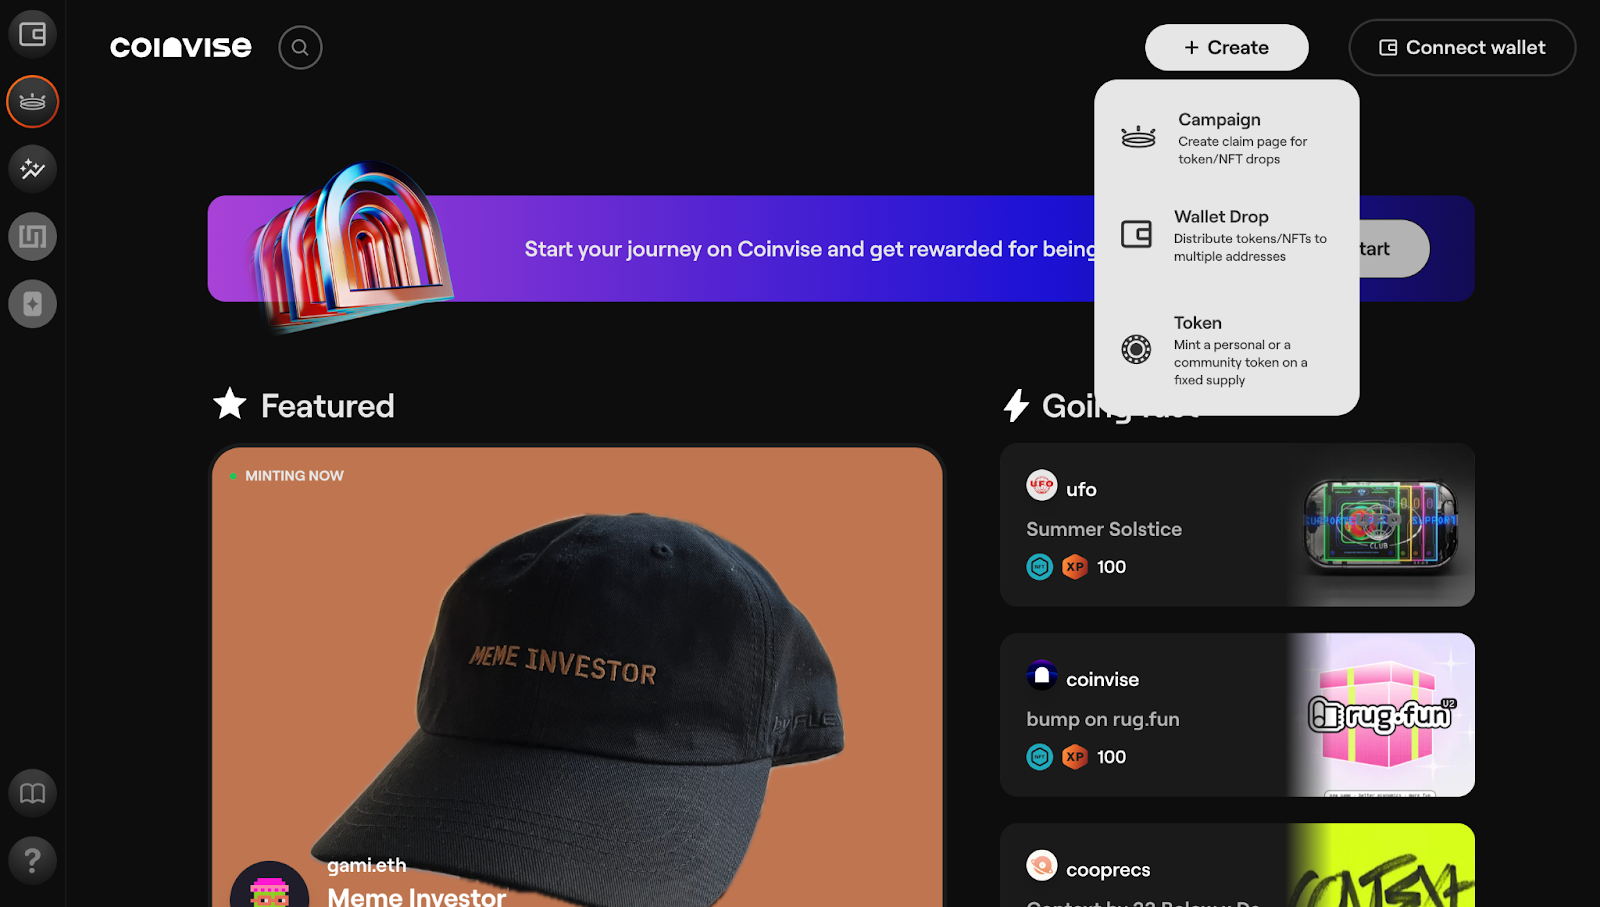
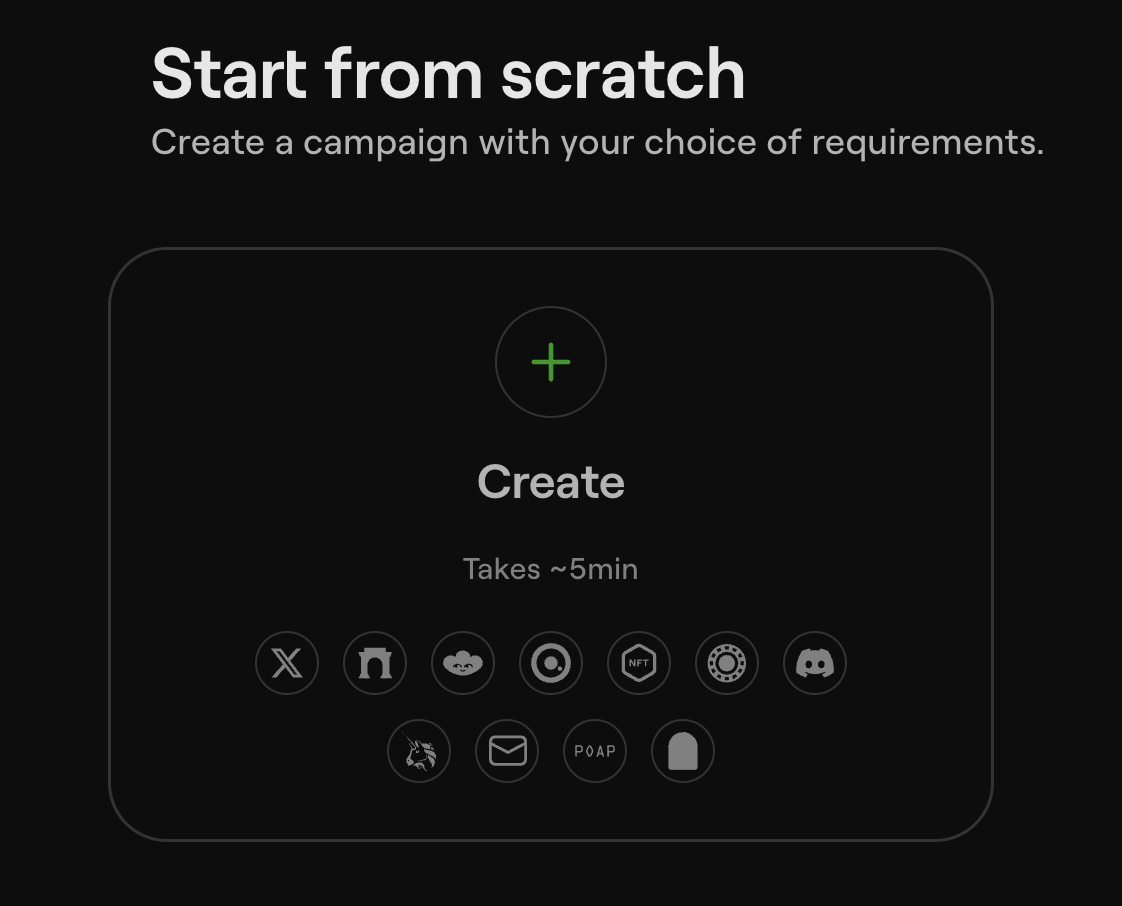
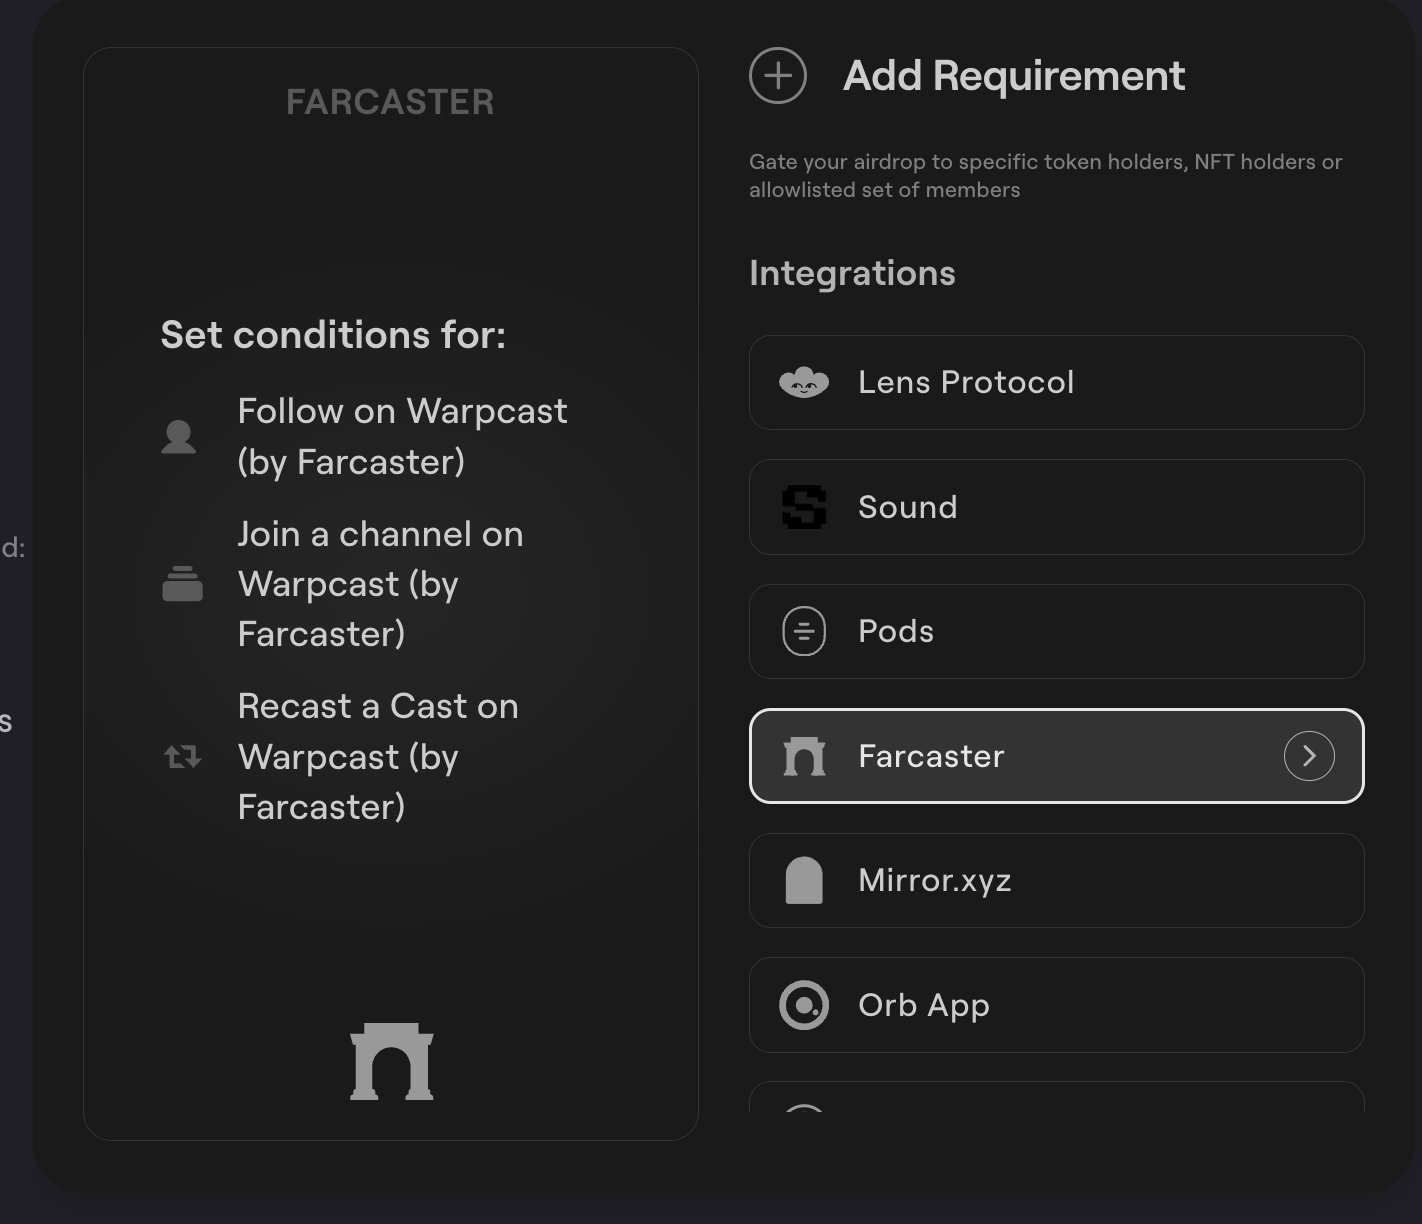
Click " + Create” then “Campaign". Here you will then have a choice to either start from scratch or use a growth template. Selecting the "Start from scratch" option allows you to create a campaign with specific requirements. Define the campaign requirements by setting criteria for participants to claim rewards, such as completing specific on-chain actions (e.g., transactions, downloads) or off-chain actions (e.g., social media tasks, follows, interactions).
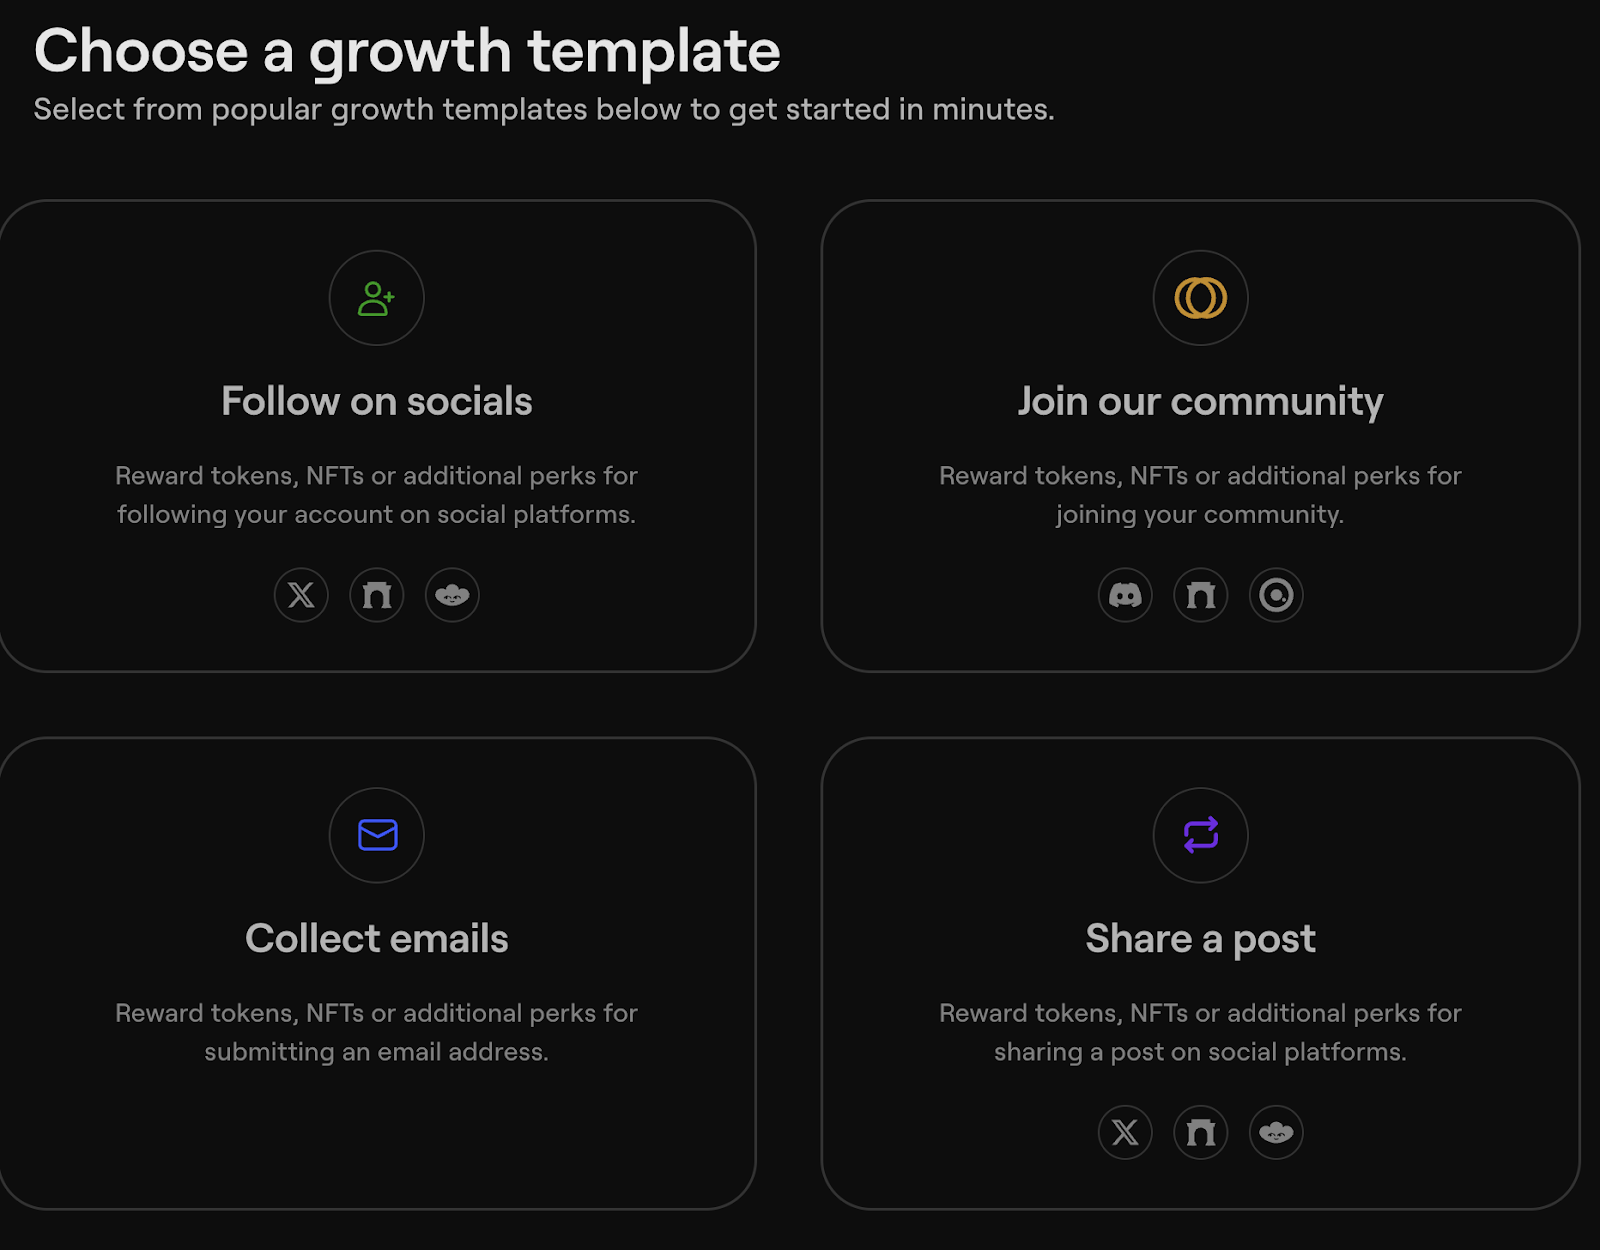
Selecting "Choose a growth template" offers popular templates done in the past and can help you get started quickly. Browse through the available templates and select one that best fits your campaign goals. Customise the template to suit your specific needs, such as adjusting the tasks required for participants or the type of rewards offered.
Templates are great for quick setups, while starting from scratch gives you full control.
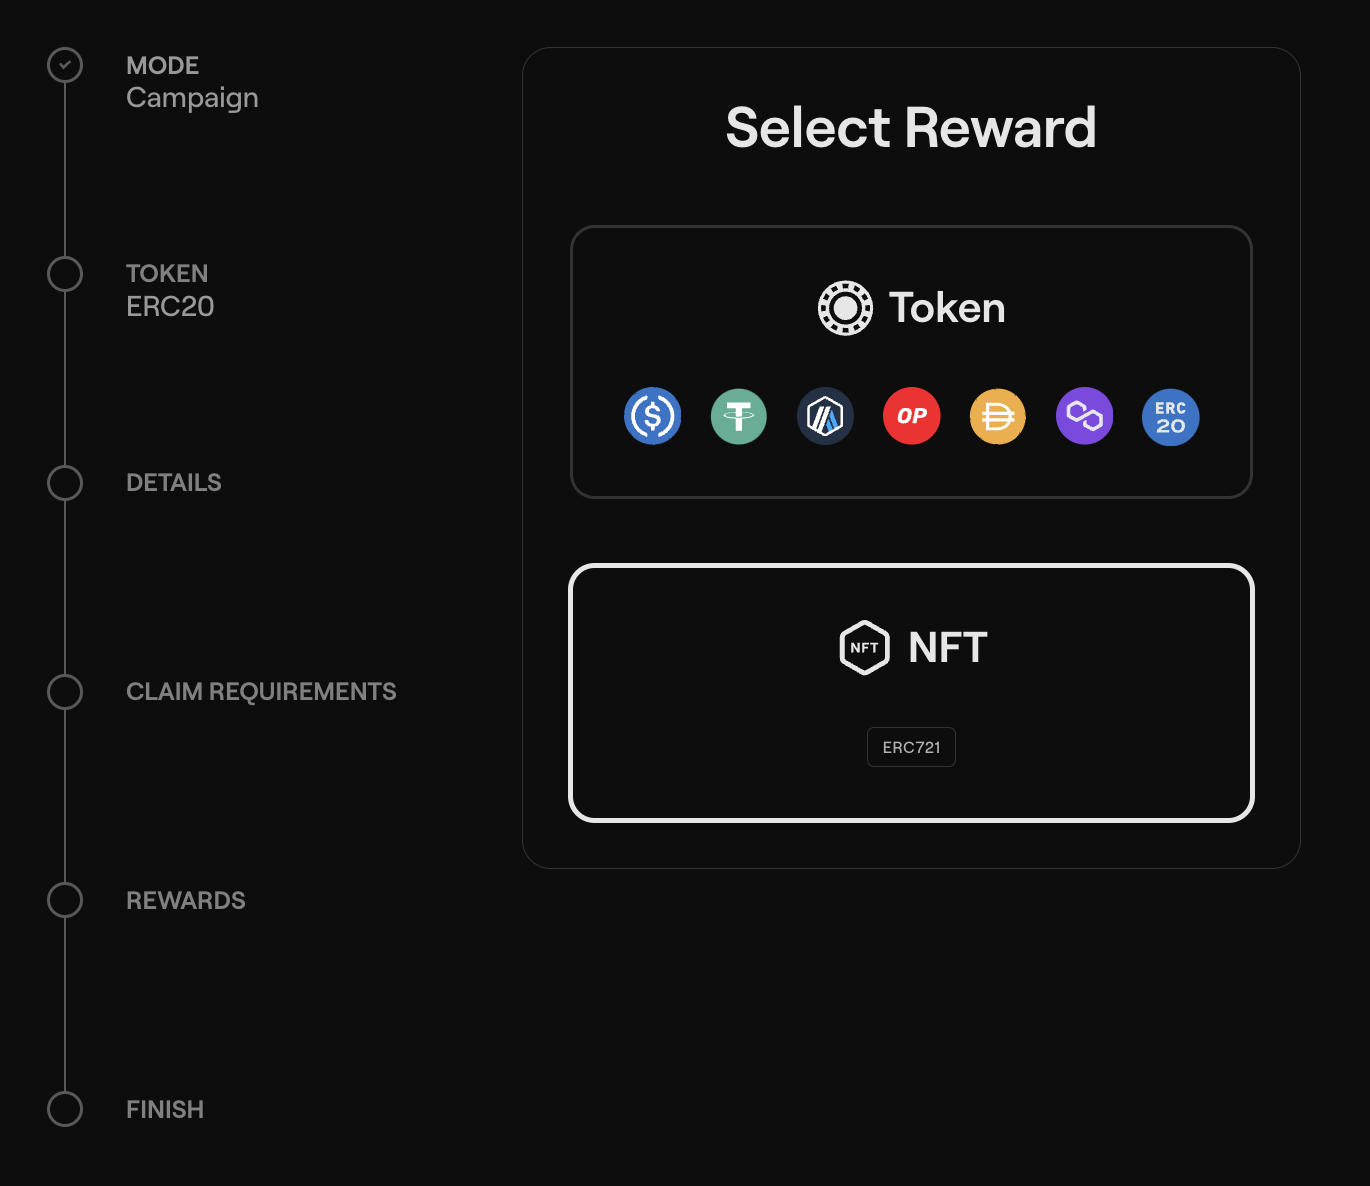
Step 2: Select Your Reward Type
After selecting your campaign, the next important step is to choose the type of reward you will offer. You will be prompted with the decision to select either 'Token' or 'NFT' as the reward type for your campaign.
Why this choice matters:
Token - Choose this option if your goal is to distribute a specific number of tokens to each participant. This is suitable for campaigns where every participant should receive an equal reward. For instance, if you want to distribute tokens for actions like referrals, social media engagements, or other widespread activities, selecting 'Token' ensures everyone gets the same reward.
NFT - Select this option if you want to offer something unique or limited, making it ideal for raffle style rewards. NFTs are best for creating exclusivity or scarcity, perfect for rewarding select winners or for situations where each reward needs to be unique, such as artwork, limited edition items, or special access tokens.
After making your selection, we can then go onto defining the specific details and criteria for your campaign.
Step 3: Define Your Campaign & Set the Rules
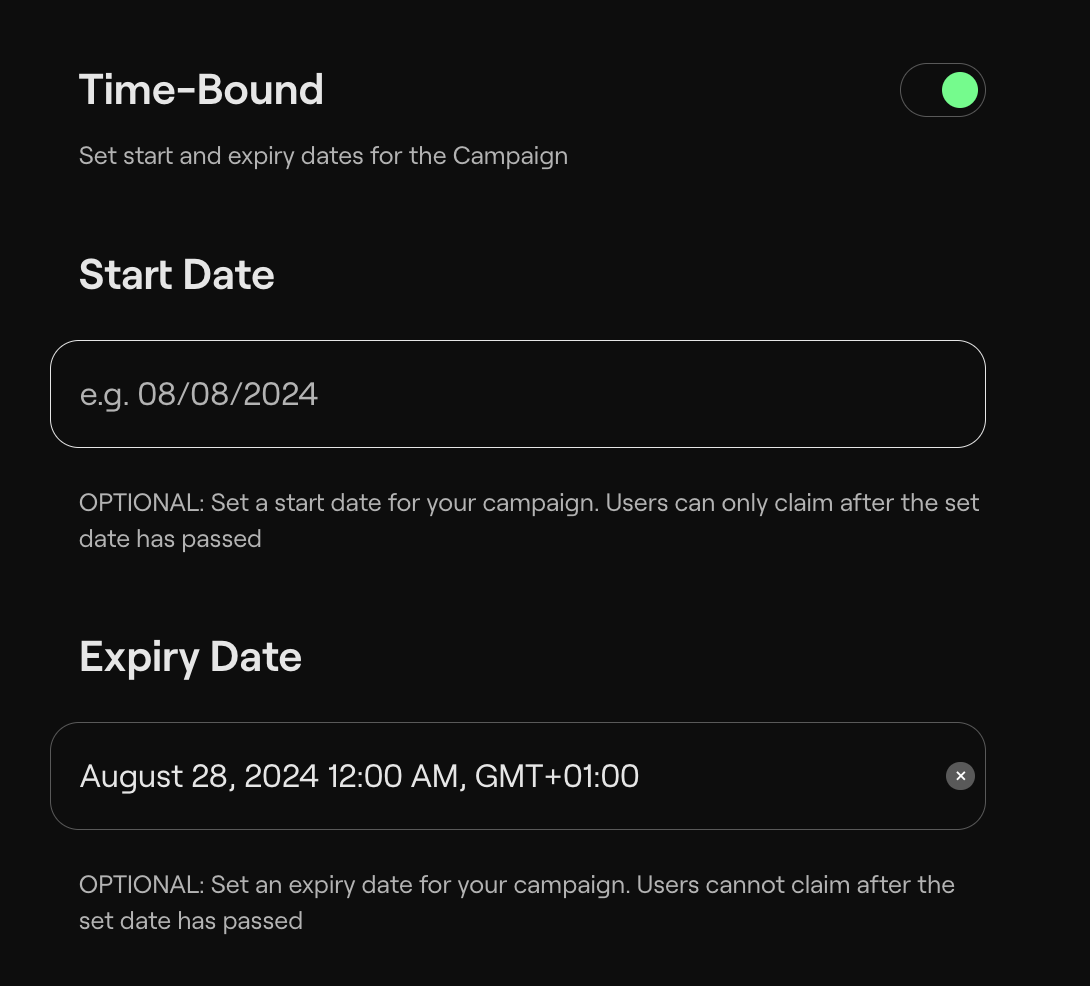
Give your campaign a name and description. Be clear and engaging – this is your chance to excite participants. Set your campaign duration. A good time frame creates urgency without rushing participants.
This is where you define what participants need to do. It could be on-chain actions like transactions or holding liquidity, or off-chain actions like social media tasks or content creation. Be specific and ensure the actions align with your community goals. Remember, each action should bring value to both the participant and your project.
Step 4: Choose Your Rewards
Reward your community and collectors upon successful completion of the campaign. You can set perks like membership to a gated community on discord/telegram, access to exclusive content, token/NFT reward for select raffle winners, loyalty points, free subscriptions, event tickets etc.
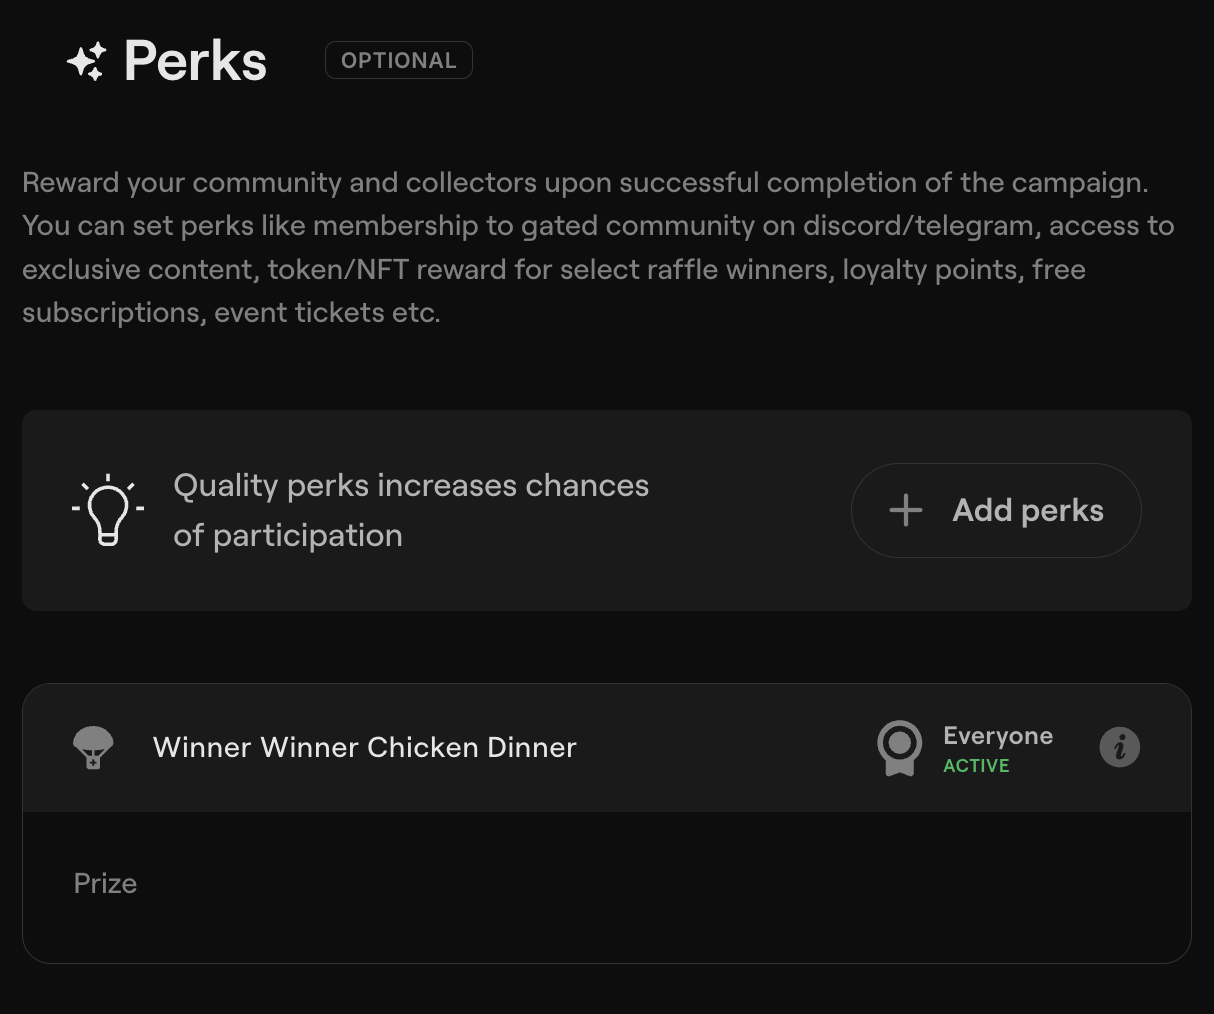
Be generous enough to motivate participation, but sustainable for your project.
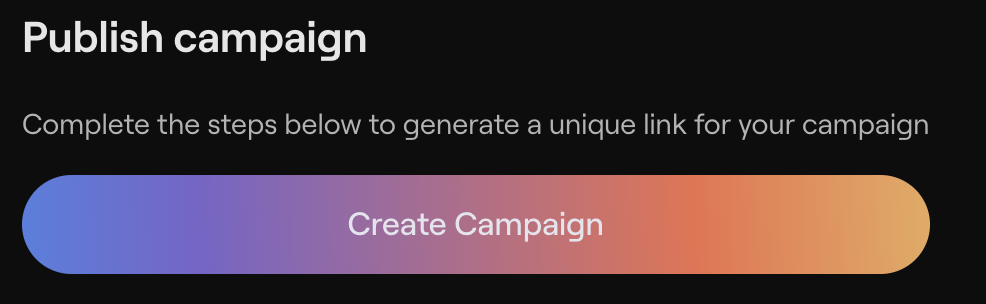
Step 5: Review and Launch
Double-check everything. Make sure the actions are clear, the rewards are set correctly, and the campaign duration makes sense. When you're ready, hit that launch button. Your campaign is now live on your wallet's network!
Step 6: Promote and Engage
Share your campaign far and wide. Use social media, your community channels, and Coinvise's sharing features. Stay active during the campaign. Answer questions, provide support, and celebrate participants' progress.
The Secret Sauce: Consistency and Creativity
Running great campaigns isn't a one-and-done deal. It's about consistently showing up for your community and getting creative with your incentives.
Don't be afraid to experiment. Try different reward structures, action types, or campaign durations. Each campaign is a learning opportunity.
Remember, you're not just distributing tokens or NFTs – you're building relationships. Design campaigns that add value to your community members' experience.
Hopefully you are now ready to launch your first Coinvise campaign. Head to Coinvise and start engaging your community in new, rewarding ways. Your Web3 journey is about to get a whole lot more exciting and we can’t wait to be a part of it!
